I still remember the first spring I planted a row of low, bright mats that felt like a small miracle. Those tiny blooms changed my backyard and gave me hope after a long winter. They can lift a bed, edge a path, or stand tall as a fragrant backdrop in a summer border.
Phlox span a wide range of size and mood: from creeping groundcover only a few inches high to upright clumps that reach several feet in height. In north america gardeners prize them for extended color and easy charm.
To succeed, match sun and soil to the species, loosen beds 12–15 inches, and mix in a few inches of compost. Plant after your local frost date or in fall with time to root. With sensible spacing and about an inch of water weekly when dry, you’ll be ready to grow healthy blooms and a resilient variety for beds, borders, and cutting gardens.
Key Takeaways
- Match sun exposure: tall types like full sun; woodland types prefer partial shade.
- Prepare soil to 12–15 inches and add 2–4 inches of compost before planting.
- Plant after the last frost or in fall at least a month before first frost.
- Provide about 1 inch of water weekly in dry spells and mulch 2 inches in spring.
- Deadhead to extend blooms, try a midseason Chelsea Chop, and divide every 2–3 years.
Why Grow Phlox Plants in U.S. Gardens Today
Native varieties add region-specific hardiness and keep beds blooming from spring through the heat of summer.
Regionally adapted species from north america offer resilience. They often bloom from early spring into peak summer, filling gaps in mixed beds. That steady run of color helps small gardens look full without extra effort.
These flowers are magnets for bees and butterflies. Adding them boosts your garden’s biodiversity and supports pollinators at a critical time.
Deer usually avoid the aromatic blooms, which makes these selections a smart choice where browsing is a problem. Tall phlox gives vertical drama while low mats spill over edges and walls.
- Varieties fit most sites — sunny borders to dappled woods.
- Even moisture and good drainage help plants return reliably year after year.
- Use them in cutting gardens for long stems and steady bouquets.
For more variety ideas and design uses, see recommended options to consider planting in your beds before the next frost.
| Feature | Benefit | Best Site |
|---|---|---|
| Native species | Regionally adapted, reliable returns | Local garden beds |
| Pollinator-friendly flowers | Attracts bees & butterflies | Pollinator borders |
| Deer-resistant aroma | Less browsing damage | Perimeter plantings |
| Tall & low varieties | Vertical accents or edge spill | Borders, rock walls, cutting beds |
Know Your Phlox: Types, Forms, and Heights
Understanding growth habit makes it easy to plan beds that flow from spring into summer.
Creeping and woodland for groundcover and shade
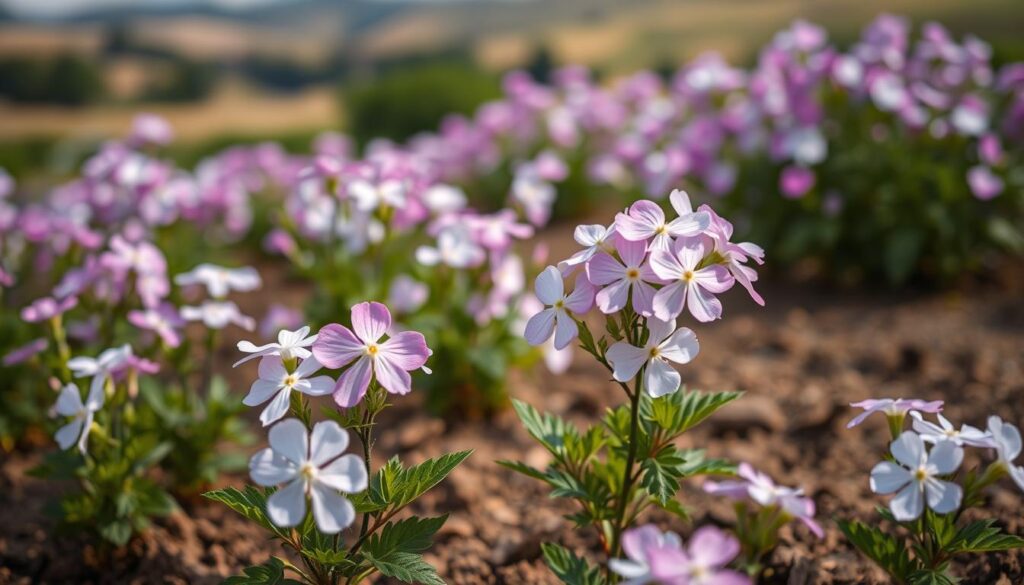
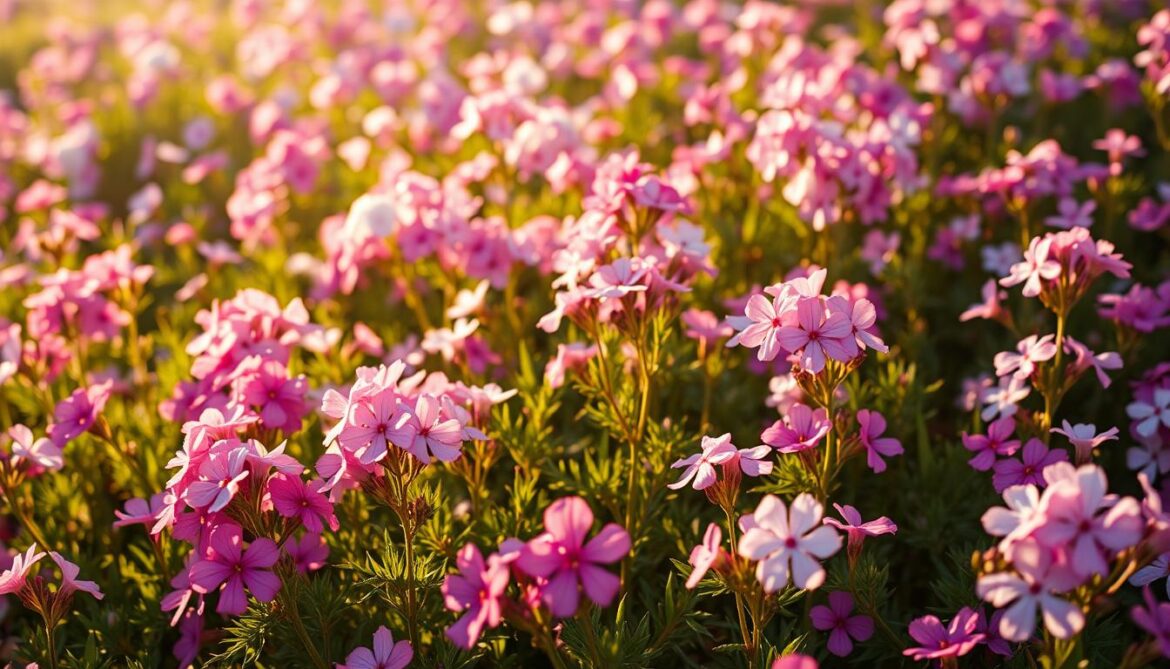
Creeping phlox (P. subulata) forms 3–6-inch mats that blanket slopes and rock walls in early spring. These low carpets add fast color and erosion control at the front of a bed.
Woodland types like P. divaricata and P. stolonifera prefer partial shade and moist, rich soil. Their blooms sit above foliage in spring and work well in mid-border, shady spots.
https://www.youtube.com/watch?v=z7fhWfoXTOQ
Tall varieties for mid–late summer color
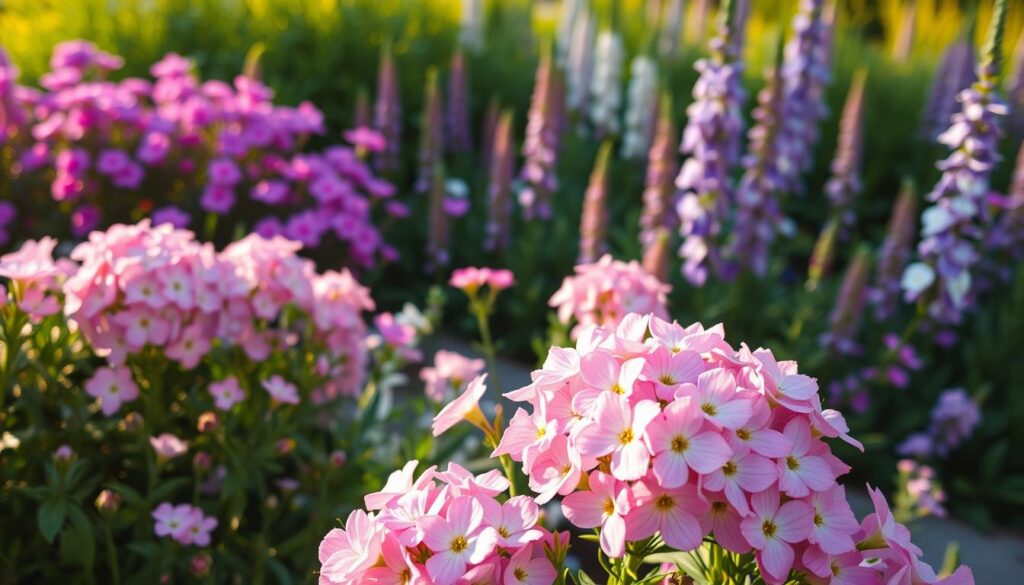
Tall phlox or garden phlox (phlox paniculata) typically reaches 3–5 feet tall and blooms in mid to late summer. Many modern cultivars resist powdery mildew, which helps in humid areas.
Annuals for fast, fragrant cut flowers
Annual phlox (P. drummondii) stays under 2 feet and blooms about 60–65 days from seeds. Pinch for longer stems and use these as a quick source of cut flower stems.
- Differentiate types by habit: low mats, shade spreaders, and upright clumps.
- Plan by height: inches-high carpets, ~1 foot woodland blooms, and 3–5 feet for tall varieties.
- Mix forms for continuous display: mats front, medium mid-border, tall garden at the back.
| Type | Typical Height | Best Use | Note |
|---|---|---|---|
| creeping phlox (subulata) | 3–6 inches | Rock walls, edges, slopes | Early spring color |
| Woodland (divaricata, stolonifera) | ~12 inches | Shade borders, under trees | Moist, rich soil |
| garden phlox (phlox paniculata) | 3–5 feet height | Back-of-border, cutting beds | Mildew-resistant cultivars available |
| annual phlox (drummondii) | <2 feet | Annual color, cut flowers | Bloom ~60–65 days from seeds |
When to Plant: Using Your Local Frost Date
Timing your garden work to local frost patterns helps new roots settle without shock.
Spring planting: Look up your local frost date and wait until the danger of frost passes before planting. Transplants and bareroot stock are commonly sold in spring and match safe planting windows. Annual varieties can be started indoors about six weeks before the average last frost; harden them off and set them out when night temperatures stay steady.
Fall window: For fall planting, aim to finish at least four weeks before the first killing frost. Cooler soil encourages root growth without forcing top growth, so perennials establish more reliably over winter.
Practical reminders
- Check microclimates: low spots freeze earlier than slopes.
- Monitor 7–10 day forecasts near planting time to avoid cold snaps.
- Align irrigation and mulch plans at planting to keep moisture steady as roots expand.
| Timing | Action | Why it matters |
|---|---|---|
| After last frost (spring) | Transplant potted or bareroot stock | Avoids freeze damage to new shoots and roots |
| 6 weeks before last frost (indoor) | Start annuals indoors | Gives head start for early spring blooms |
| ≥4 weeks before first killing frost (fall) | Plant perennials | Roots establish in cool soil without top stress |
Site and Soil Prep for Strong, Mildew-Resistant Growth
Good bed preparation is the most effective defense against disease and weak growth. Choose a site that matches the variety: give tall garden selections six or more hours of direct light, while woodland types do best in partial shade with richer, evenly moist soil.

Soil depth and enrichment
Loosen the bed 12–15 inches and blend in a top layer of 2–4 inches of compost to improve structure, fertility, and drainage. A light test of pH is useful, but drainage matters most for success.
Drainage, spacing, and air
Place plants where water won’t pool after storms. Raised beds or amended soil solve slow-draining spots.
Space by mature spread so foliage dries quickly. Good air circulation and proper spacing are the best cultural tools against powdery mildew.
- Keep soil evenly moist but never soggy to help roots expand and sustain blooms.
- Mulch 2 inches after planting to stabilize moisture and suppress weeds.
- Choose resistant varieties and avoid crowding near fences or hedges that trap humidity.
| Prep Step | Why it matters | Target |
|---|---|---|
| Loosen soil | Encourages root growth and drainage | 12–15 inches |
| Add compost | Improves fertility and structure | 2–4 inches top layer |
| Spacing & airflow | Reduces humidity and disease | By mature spread |
| Site choice | Prevents waterlogging and stress | Full sun for tall garden, partial shade for woodland |
How to Plant Phlox: Transplants, Bareroots, and Spacing
Give each new transplant a roomy hole and a level crown to help roots settle quickly.
Dig a hole about twice the pot’s diameter and set the top of the root ball even with the surrounding soil. Tease any circling roots so they spread outward. Avoid burying stems too deep; that invites rot.
Backfill with native soil amended if needed, then firm gently to remove air pockets. Water in thoroughly to settle soil and begin root contact. For bareroot divisions, align the crown at soil level and spread roots carefully.
Spacing for airflow and vigor
Space by mature width and height so foliage dries quickly. Wider gaps are best for tall phlox and upright species to promote air circulation and reduce disease pressure.
- Check soil moisture 2–3 inches down before you water.
- Keep first-season moisture steady with weekly deep watering to encourage deep roots.
- Stake only if wind regularly causes leaning; otherwise spacing and sun make stems sturdy.
| Step | Action | Why it matters |
|---|---|---|
| Hole size | Twice pot diameter | Room for roots to expand |
| Root preparation | Tease or loosen circling roots | Prevents girdling and improves anchoring |
| Crown level | Top of root ball even with soil | Reduces rot and encourages healthy shoots |
| First-season watering | Weekly deep soak | Builds deep, resilient root systems |
Watering, Feeding, and Mulching Through Spring and Summer
Routine care in spring sets the rhythm for a healthy summer display. Start with a plan that balances moisture, light feeding, and mulch to protect roots and encourage steady blooms.
Weekly moisture targets and first-season drenching
Target about 1 inch of water per week during active growth. If rainfall is under that, water weekly with deep soaks that wet the root zone rather than just the surface.
Use drip lines or soaker hoses where possible. They deliver consistent moisture and keep foliage dry to reduce disease risk.
“Drench the soil, not the leaves; wet foliage overnight invites mildew and leaf spots.”
Spring compost top-dress plus a 2-inch mulch
Each spring, add a thin top-dress of compost to feed soil biology and support steady flower production. Follow with a uniform 2‑inch mulch after soils warm.
- Monitor soil by feeling 2–3 inches down; water when that depth feels dry.
- Avoid late-evening overhead watering that leaves leaves wet overnight.
- In containers, check moisture more often—potting mixes dry faster than beds.
| Action | Why it helps | Timing |
|---|---|---|
| Deep weekly soak | Hydrates roots, builds resilience | Spring–summer when rainfall is low |
| Compost top-dress | Feeds soil life, supports blooms | Early spring |
| 2-inch mulch | Conserves moisture, suppresses weeds | After soil warms |
Seasonal Care: Deadheading, Chelsea Chop, and Cutting Back
Simple midseason care makes stems stronger and helps blooms return later in summer.
Deadhead spent blooms regularly to redirect energy into new flower production and keep the bed tidy through summer.
Remove faded flowers as soon as they wilt. This reduces disease and encourages a second flush of color. Sanitation matters: collect and discard spent stems and fallen leaves to limit overwintering spores where mildew is common.
Try the Chelsea Chop to extend bloom
The Chelsea Chop is a late-spring cut that removes one-third to one-half of the stems. It delays peak bloom and often produces bushier, more compact growth. Cut evenly across the bed to avoid a patchy display.
Cutting back after frost
After the first killing frost, cut tall garden phlox down to about 1–2 inches. This cleanup resets beds for winter and reduces hiding places for pests.
Divide to rejuvenate
Divide congested clumps every 2–3 years. Division increases airflow, lowers mildew risk, and supplies free starts for other beds. Mark standout clumps in late summer so you remember prime divisions in fall or early spring.
- Sharpen and disinfect tools between cuts to prevent disease spread.
- Selectively thin crowded stems midseason to improve interior airflow.
- Mulch after cutback to protect crowns and moderate freeze-thaw cycles.
| Task | When | Why |
|---|---|---|
| Deadheading | Throughout summer | Encourages rebloom and keeps plants tidy |
| Chelsea Chop | Late spring | Staggers bloom, creates bushier growth |
| Cutting back | After killing frost | Prepares bed for winter, reduces disease |
| Division | Every 2–3 years | Rejuvenates clumps, improves airflow |
Spotlight on Varieties and Uses
Select cultivars that solve site problems and lift a border with steady color.

Creeping favorites such as ‘Candy Stripe’ (pink-and-white) and ‘Emerald Blue’ drape beautifully over rock walls and edges. They make spring carpets that spill over stones and stabilize slopes.
Woodland picks — ‘Sherwood Purple,’ ‘Blue Moon,’ and ‘Chattahoochee’ — perform best in partial shade with moist, rich soil. Use them in dappled beds or under small trees for reliable spring color.
Tall garden standouts
For midsummer impact, choose garden phlox selections like ‘David’ (white) and ‘Jeana’ (petite purple). Both have good resistance to powdery mildew and hold clean foliage through humid weather.
- Layering idea: creeping in front, woodland mid-border, tall phlox as a backdrop.
- Design pairings: combine medium and tall varieties with lilies, rudbeckia, Shasta daisies, yarrow, and clematis for steady summer blooms.
- Color strategy: repeat one variety around the bed for cohesion or mix varieties for a painterly effect.
| Use | Recommended variety | Site | Benefit |
|---|---|---|---|
| Rock walls & edging | ‘Emerald Blue’, ‘Candy Stripe’ | Sunny, well-drained | Spring carpet, erosion control |
| Shaded borders | ‘Sherwood Purple’, ‘Blue Moon’ | Partial shade, rich soil | Reliable spring color in cool spots |
| Back-of-border height | ‘David’, ‘Jeana’ (phlox paniculata) | Full sun to light afternoon shade | Mildew-resistant, fragrant midsummer bloom |
| Cutting border | Strong-stemmed varieties | Mixed perennial beds | Long stems for vases, repeated harvests |
Annual Phlox for Cut Flowers: Sowing, Pinching, and Harvest
For long vase-ready stems, focus on dark germination, timely pinches, and staggered sowings.
Seed-starting in darkness and transplant timing
Sow seeds in darkness — cover lightly with soil or vermiculite, or stack trays to exclude light. Germination usually appears in 10–21 days.
Start indoors about six weeks before your last spring frost. Move seedlings to bright light once they sprout and harden off. Transplant outdoors only after frost danger passes.
Pinching for longer stems and better bouquets
Space seedlings 6–9 inches apart and pinch the tips early. Repeat pinching once or twice to encourage branching and push stems toward about 18 inches.
Avoid netting; well-timed pinches and spacing keep stems orderly without tangling.
Harvest stage, vase life, and succession planting
Harvest when roughly half the florets on a stem are open so the rest open in the vase. Expect about seven days of vase life with clean water and cool conditions.
Succession plantings every three weeks extend the cutting window into summer. Mature annuals often shrug off light frost and can be among the last cutters in fall.
“Cut when half the blooms are open — it gives a fuller bouquet and longer vase life.”
| Task | Timing | Result |
|---|---|---|
| Sow in darkness | Indoors ~6 weeks before last frost | Reliable germination in 10–21 days |
| Pinch repeatedly | Early growth stage | Stronger branching and ~18‑inch stems |
| Succession sowing | Every ~3 weeks | Continuous cut flower production |
Pests, Diseases, and Prevention
A routine inspection and smart siting cut disease and pest problems before they start.
Powdery mildew is the most common issue on garden phlox. Maximize spacing so air moves through the bed and keep foliage dry by using drip or soaker irrigation. Choose resistant cultivars like ‘David’ and ‘Jeana’ where your site is prone to susceptible powdery mildew.
Scout weekly for white powder, leaf spots, or rust and remove affected leaves promptly. Early removal lowers inoculum and helps protect healthy stems and blooms. Avoid poorly drained soil and correct wet spots to reduce rot and stem canker risk.
Other pests and focused controls
Watch for caterpillars and leaf miners that chew or tunnel. Treat soft-bodied pests with neem oil or insecticidal soap when you catch them early. In slug-prone areas, use baits or traps to protect low growth in spring.
- Prioritize cultural controls: spacing, air circulation, and dry foliage.
- Use morning base water so leaves dry quickly and lower fungal pressure.
- Sanitize tools and discard diseased debris to break recurring cycles.
- Plan site changes if an area shows repeated susceptible powdery or other disease problems after several seasons.
“Good drainage, clean beds, and weekly checks are the best defense for long-term health.”
Conclusion
A simple formula helps you grow phlox successfully: choose the right type for the site, prep soil deeply with compost, and water about an inch weekly in dry spells.
Pick mildew-resistant garden phlox for sunny borders and woodland types for dappled beds to keep foliage clean. Plant after the last frost or use the fall window so roots establish before hard freezes.
Keep seasonal care simple: deadhead spent blooms, try a Chelsea Chop to extend color, and cut back after frost. Divide tall garden phlox every few years to renew vigor and improve airflow.
Include annual phlox for cut flowers—start in darkness, pinch for long stems, and succession-sow for ongoing harvests. With a few steady habits you’ll be ready grow abundant flowers and enjoy fragrant stems through spring and summer.

